Amazing Kimchi, a Straightforward Classic Napa Cabbage Condiment
This version is“ Kimchi” (막김치), which salted and fermented vegetables.
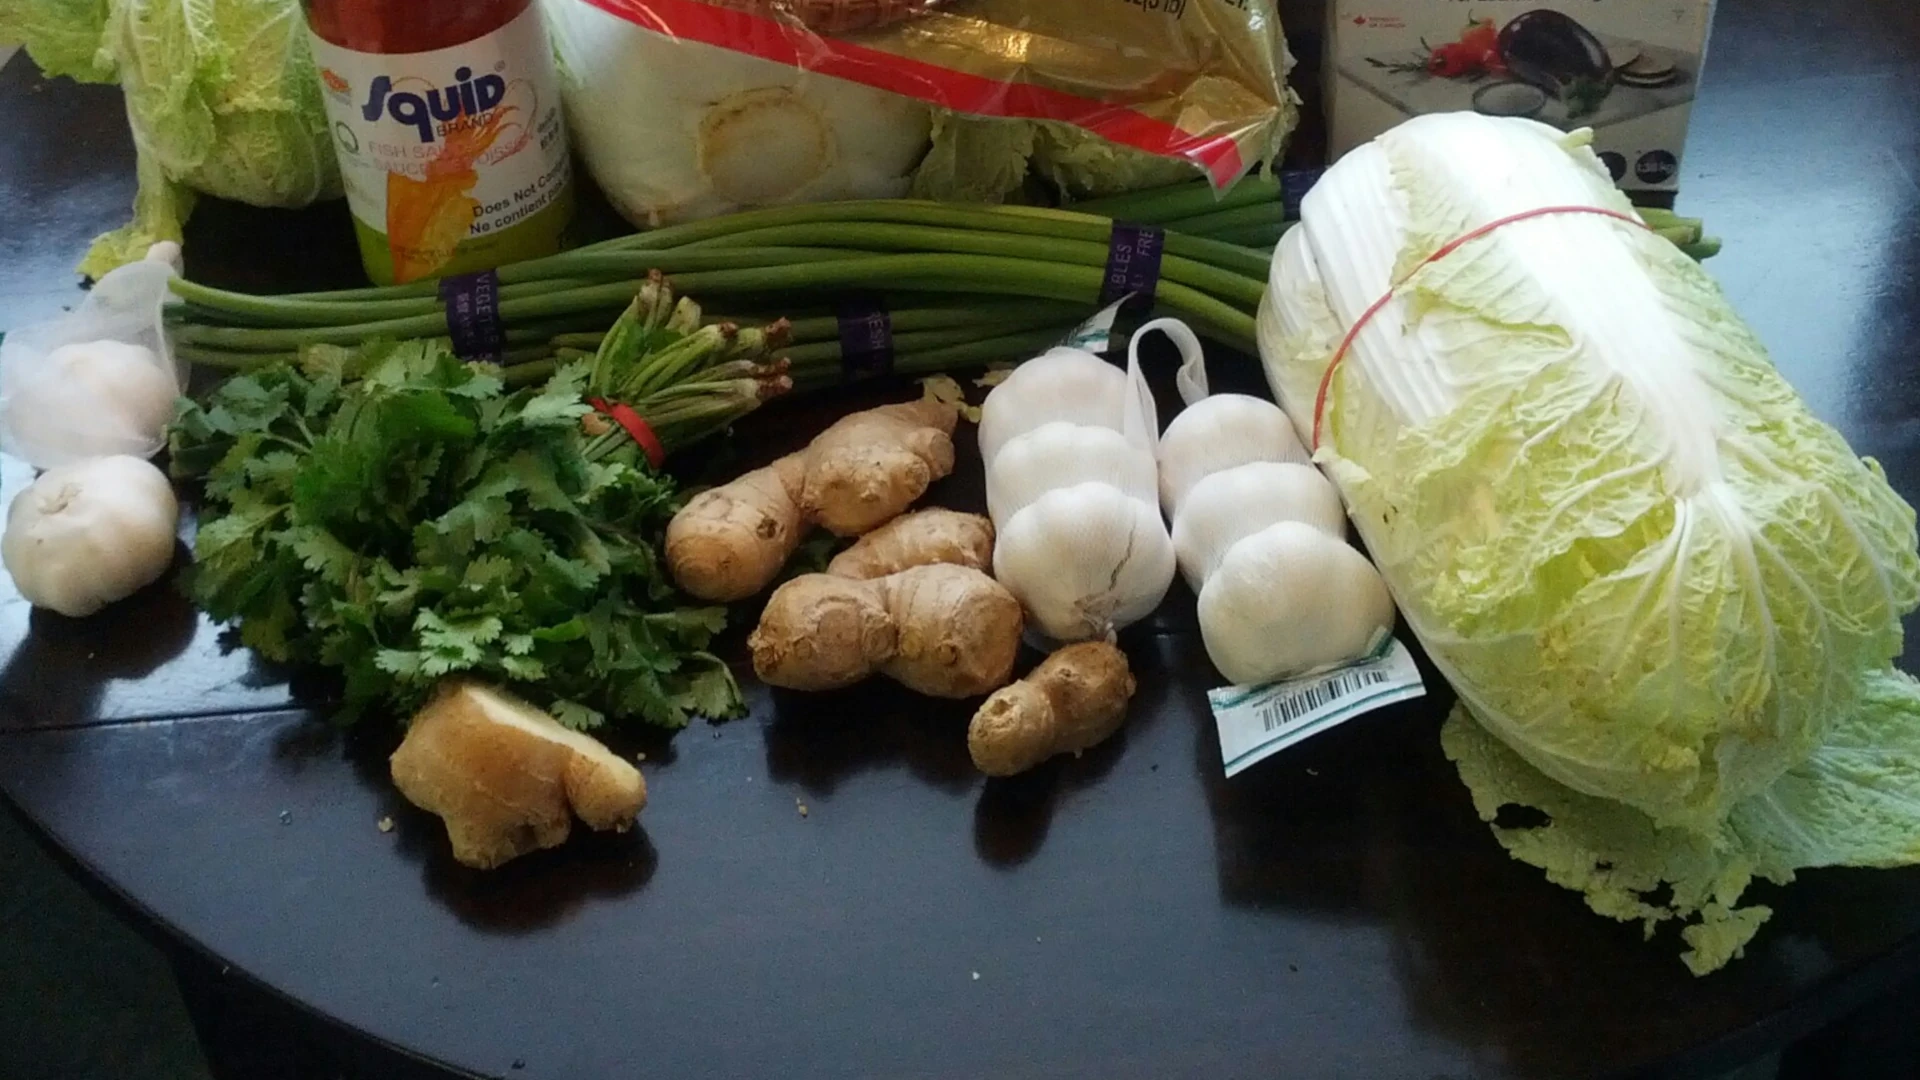
Step-by-step guidelines, listing all necessary components, equipment, and some suggestions on technique.
Labour required 1 hour depending on amount made.
Yields: About 2-3 quarts/litres
Fermentation time:1-5 days at room temp, then months in the fridge
Main Ingredient
- 1 large head Napa cabbage (about 2-2.5 kg or 4–5 lbs)
- 1/2 cup Korean coarse sea salt (do not use table salt with iodine/anti-caking agents)
Porridge (for a better paste consistency)
- 1 cup water
- 2 tbsp sweet rice flour (aka glutinous rice flour)
- 2 tbsp white sugar
Vegetables & Aromatics
- 1 cup Korean radish or daikon, cut into matchsticks
- 1 cup carrot, cut into matchsticks (optional)
- 4-5 green onions, cut into 1-inch pieces
Kimchi Paste
- 1/2 cup Korean gochugaru (coarse Korean red chili pepper flakes): This is essential for authentic flavour.
- 1/2 cup fish sauce (or soy sauce for a vegan version)
- 1/4 cup minced garlic (8-10 cloves)
- 1 tsp minced ginger
- 1 small onion, minced or puréed
- 1-2 tbsp salted shrimp (saeujeot), minced (optional, for extra umami)
- 1-2 tsp salted shrimp brine (optional)
- 1 Asian pear or apple, puréed (optional, for natural sweetness and tenderness)
Instructions
Prepare and Salt the Cabbage
- Cut the Cabbage: Cut the cabbage lengthwise into quarters. Remove the tough core. Then, cut each quarter into bite-sized (2-inch) squares or lengthwise, attaching leaves to stem.
- Wash and Salt: Place the cabbage pieces in a large bowl. Sprinkle the salt evenly between the leaves, starting from the thicker white stems. Use your hands to massage the salt in, ensuring it’s well distributed.
- Brine: Every 30 minutes for the next 2 hours, turn the cabbage over to ensure even salting. You will notice the cabbage becoming softer and wilting, and water will pool at the bottom of the bowl.
- Rinse and Drain: After 2–3 hours (or when the white stems bend without snapping), rinse the cabbage thoroughly 3 times in cold water to remove the salt. Drain well in a colander. Taste a piece—it should taste salty, but not unpleasantly so. Squeeze out any excess water.
Make the Kimchi Paste
- Make the Porridge: In a small saucepan, combine the water and sweet rice flour. Whisk over medium heat until it starts to bubble and thickens to a thin paste (about 3–5 minutes). Remove from heat and stir in the sugar until dissolved. Let it cool completely.
- Combine all Ingredients: In a very large bowl, combine the cooled porridge, gochugaru, fish sauce, minced garlic, ginger, puréed onion, and the optional ingredients (salted shrimp, pear purée).
- Mix Well: Stir until a thick, red paste forms.
- Add Vegetables: Add the radish, carrots, and green onions to the paste and mix until evenly coated.
Combine Everything!
- Glove Up! Put on disposable gloves (the gochugaru will stain your hands) This is recommended but not the best idea as your hands contain the bacteria which helps fermentation.
- Add the well-drained cabbage to the large bowl with the kimchi paste and vegetables.
- Using your hands, gently but thoroughly massage and mix the paste into the cabbage, making sure every leaf and piece is coated in the beautiful red paste.
Pack and Ferment
- Pack Tightly: Pack the kimchi tightly into clean glass jars, plastic containers, or a dedicated kimchi container. Press down firmly as you pack to remove air bubbles and help the brine (liquid) rise over the vegetables.
- Leave Headspace: Leave at least 1–2 inches of space at the top, as the kimchi will expand during fermentation.
Seal and Ferment
- Initial Fermentation: Seal the jar and let it sit at room temperature (ideally 65-70 °F / 18-21 °C) for 1–2 days. In warmer climates, this may only take 24 hours. You may see bubbles forming, and liquid may seep out—this is normal! You can place the jar on a plate or tray to catch any overflow.
- Check for “Sourness”: After 24 hours, taste it. It’s ready for the fridge when it has developed a pleasant tangy flavour. The longer it ferments at room temp, the sourer it becomes.
- Cold Storage: Once it’s sour to your liking, transfer the kimchi to the refrigerator. The fermentation will slow dramatically but continue over weeks and months, developing deeper, more complex flavours.
Tips for Success & FAQs
· The Key Ingredient is Gochugaru: Using the correct Korean red pepper flakes is non-negotiable. Other chili powders will not taste the same and can be much spicier.
· Don’t Skip the Salting: Proper salting is crucial for texture and safety. It draws out water, seasons the cabbage, and inhibits bad bacteria.· Is it safe? If you see bubbles, smell a tangy, pungent aroma, and your kimchi is sour, it’s working perfectly! Mould is very rare if you use clean utensils and keep the kimchi submerged in its brine. If you see mould only on the surface, you can often remove the top layer—the kimchi underneath is usually fine.
·How to Eat
Fresh: within the first 24 hours as a fresh side dish.
Fermented over time: Enjoy it as a banchan (side dish) with rice.
Cooked with Fermented: to make Kimchi Jjigae (stew), Kimchi Bokkeumbap (fried rice) pancakes and soup
Enjoy the process and eating delicious homemade kimchi!
Leave a Reply